How To Install And Manage Fonts On Your Computer

Installing and managing fonts on your computer can seem like a daunting task. However, with the right steps, it can be a relatively straightforward process. Start by finding a reputable source for your font download and make sure it is compatible with your operating system before selecting it. Once you have downloaded the font, you will need to install it into your computer’s font library so that you can use it in programs like Microsoft Word or Adobe Photoshop.
Navigate to the Fonts Manager or Library within the settings of your computer and drag the new font file into the designated folder. You will then be able to check if the font is installed correctly and start using it as desired. With this process, managing fonts on your computer becomes an easy and stress-free experience.
What Are Fonts?
Fonts are the letters and symbols that appear in the text. They come in many styles and sizes, from traditional serif fonts like Times New Roman to modern sans-serif fonts like Helvetica. When combined with colors, images, or other elements, they create visual impact and help convey ideas or messages.
What Makes Fonts Unique?
Fonts have been around for centuries, but it wasn’t until the invention of the printing press that they really took off. Today there are literally thousands of different fonts available, each with its own unique characteristics that make it stand out from the rest. These characteristics such as size, style (serif vs sans-serif), weight (boldness), and spacing give each font its own personality.
Why Are Fonts Important?
Fonts can be used to convey an emotion or create visual interest in design projects. They can also be used to impart information such as dates or addresses. Depending on the font you choose, your design may appear professional or playful, serious or whimsical, classic or contemporary. Choosing the right font for your project is key to creating an effective design that resonates with your audience.
How to Install Fonts on Windows
Installing fonts on your Windows computer is a simple process that just requires a few clicks. Whether you’re looking to add some extra pizzazz to your documents or give your design project the perfect finishing touch, having access to a variety of fonts can help you create something truly special. Here’s how it’s done.
Download The Font File
The first step in installing a font is downloading the font file from the internet or from another source. Before downloading, make sure that you know where the font file is located on your computer. You will need to be able to locate it again in order for the installation process to work properly. Once you have downloaded the file, double-check that it is compatible with Windows before continuing.
Unzip The Font File
Once you have downloaded and saved the font file, double-click on it in order to unzip it. This will reveal all of the individual files associated with that particular font style and version number. Make sure that all of these files are included in your folder before moving on to step three.
Install the Fonts
After unzipping the folder containing all of your font files, open up Control Panel and select “Fonts” from there. When prompted, choose “Install New Fonts” and then browse for where you saved your unzipped folder containing all of those individual files mentioned earlier make sure they are all present. Select them, click OK, and then wait for a few moments while they install onto your computer’s system drive.
Managing fonts on Windows
Working with fonts can be a daunting task for anyone, especially those who are new to the world of computer graphics and design. Whether you’re creating a logo, designing a website, or just wanting to change up the look of your computer screen, it’s important to understand how to manage your fonts. Luckily, managing fonts on Windows is fairly straightforward and easy to learn.
Adding & Removing Fonts in Windows
Adding and removing fonts in Windows is an easy process. To add fonts, simply open the folder containing the font files, select all of them by pressing Ctrl + A, and then right-click any of the selected files and choose “Install”. This will install all of the selected fonts into your font library. To remove a font from your library, simply open the “Fonts” window in Control Panel or use Start search and select the font you want to remove. Then click “Delete” at the top of the window and confirm that you want to delete it.
Installing fonts on Mac
Installing fonts on your Mac can be a great way to customize your experience and add personality to your documents. Fortunately, it’s easy to download and install any font you want.
Downloading Fonts
The first step is downloading the font you want. There are plenty of free and paid resources for finding fonts online; some popular sites include DaFontsPro. When selecting a font, make sure that it is compatible with Mac. Most fonts will have their system requirements listed in the description or FAQ section, so double-check before downloading. Once you find a font you like, click “Download” or “Install” to save the file onto your computer. It should be in a zip folder format, if not, unzip it before continuing.
Installing Fonts
Once you have downloaded the font files, all you need to do is install them on your Mac system. To do this, open the “Finder Window” by clicking its icon in the dock at the bottom of your screen. Then click “Go” at the top of the window this will open a drop-down menu and select “Go to Folder” Type in /Library/Fonts/ into the box that appears, then click Go again.
This will take you directly to where all installed fonts are stored on your computer, drag and drop any downloaded font files into this folder from another window on your desktop or Finder window you can also use Command + C & V for copy & paste then close out of both windows when finished. You may need an admin password if prompted during installation just enter it when asked and hit OK/Continue to finish the installation.
Using Your New Fonts
Now that your fonts are installed, they will show up wherever text boxes appear across all applications on your computer. To test out your newly added fonts, try typing something into TextEdit which is already installed on every Mac. When creating or editing text fields across other programs such as Adobe Photoshop or Microsoft Word, just select “Font Family” from the drop-down menu under “Formatting Options” or similar to view available options, any new fonts should appear here after the installation was successful.
Managing fonts on Mac
Are you a Mac user who is looking for an easier way to manage the fonts on your Mac? Managing fonts can be a challenge, especially if you’re not familiar with the process. But don’t worry we’ve got you covered.
Using Font Book for Font Management
The best way to manage fonts on Mac is by using the built-in application called “Font Book.” This app will allow you to review all of the fonts installed on your system, as well as install or delete new ones. Here are the steps to follow when using it:
- Open Font Book by clicking on its icon in Applications.
- Click on the “+” sign at the bottom left of the window and select “Add Fonts” from the dropdown menu that appears.
- Browse through your computer for any additional font files that you wish to add and select them, you can select multiple files. Once selected, click “Open” in order to add them to your library.
- To delete a font, simply select it and click “Remove” at the bottom left of the window. Please note that some fonts cannot be deleted as they may be necessary for an app or system function, these fonts will be grayed out and unselectable in Font Book.
- To preview any font file, double-click its name in Font Book to open up a separate window with all of its characters listed including upper and lowercase letters, numbers, symbols, etc. You can use this preview window to see how different characters look before adding them to any design projects or documents that you are working on.
- Finally, when finished managing your font library click “Done” at the bottom right corner of the window and close out of Font Book entirely until needed again.
Conclusion
Fonts are more than just letters and symbols, they have the power to capture attention and evoke emotion in viewers. Whether you’re creating a logo or designing an advertisement, understanding how fonts work is essential to achieving success with your project. By taking some time to research different types of fonts and their unique features you can ensure your designs will stand out from the crowd.
Free Fonts:
 The Psychology Of Font Choice In Branding
  Creating Custom Fonts: A Step-by-Step Guide
 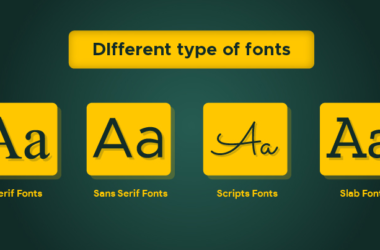 The Difference Between Serif And Sans-serif Fonts
 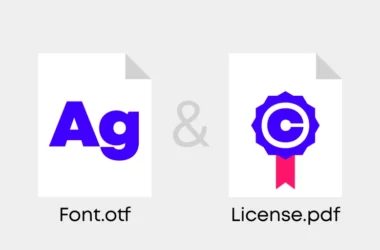 The Role of Font Licensing In The Design Industry
  Tips For Optimizing Print Fonts For Clarity And Readability
  Clurbantik Font
  Qonara Font
  Reey Script Font
  D DIN Font